Personal Project
CGI

More Coming Soon….
CGI
More Coming Soon….

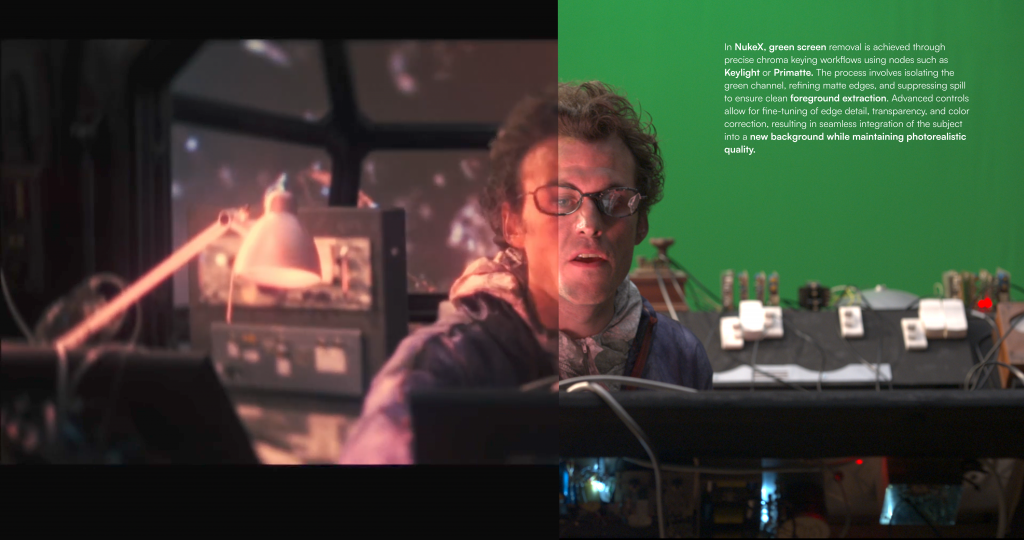
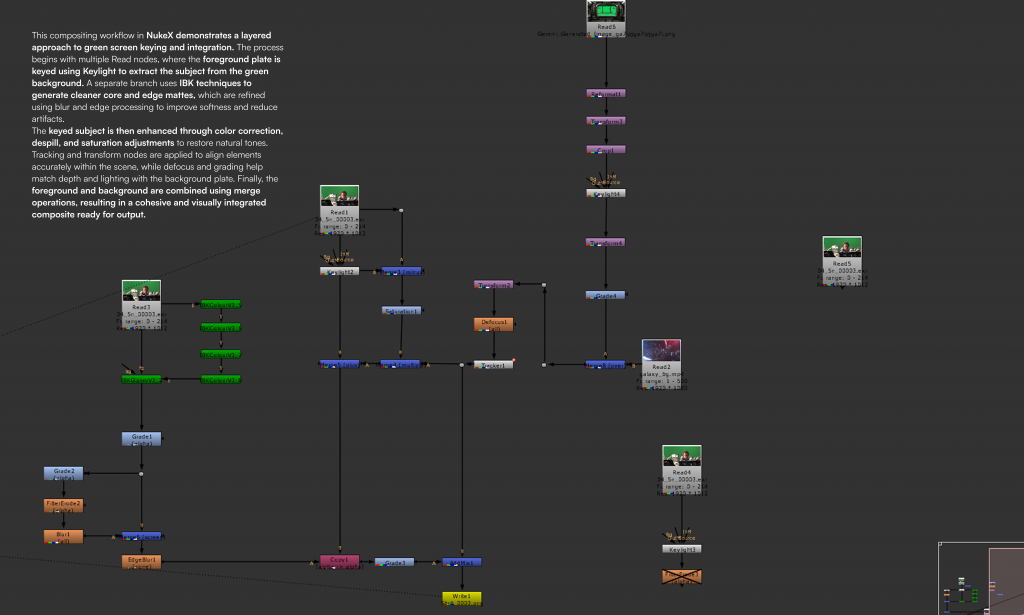
NukeX
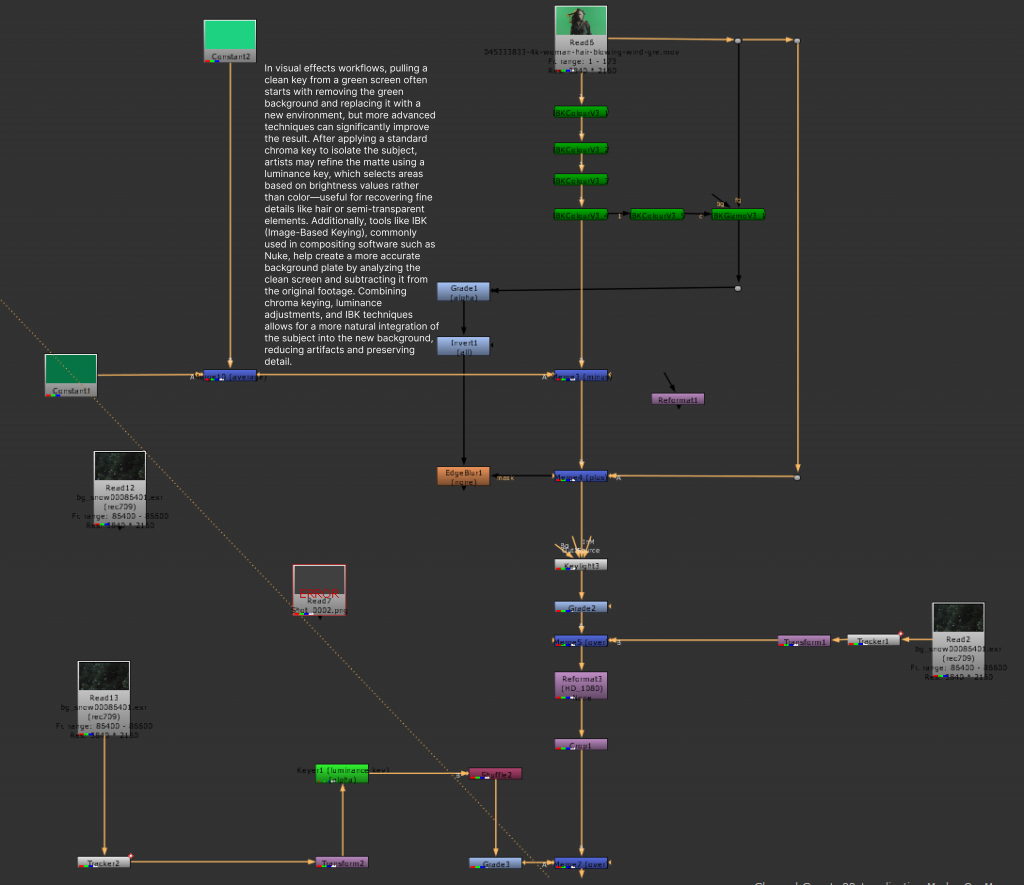
NukeX
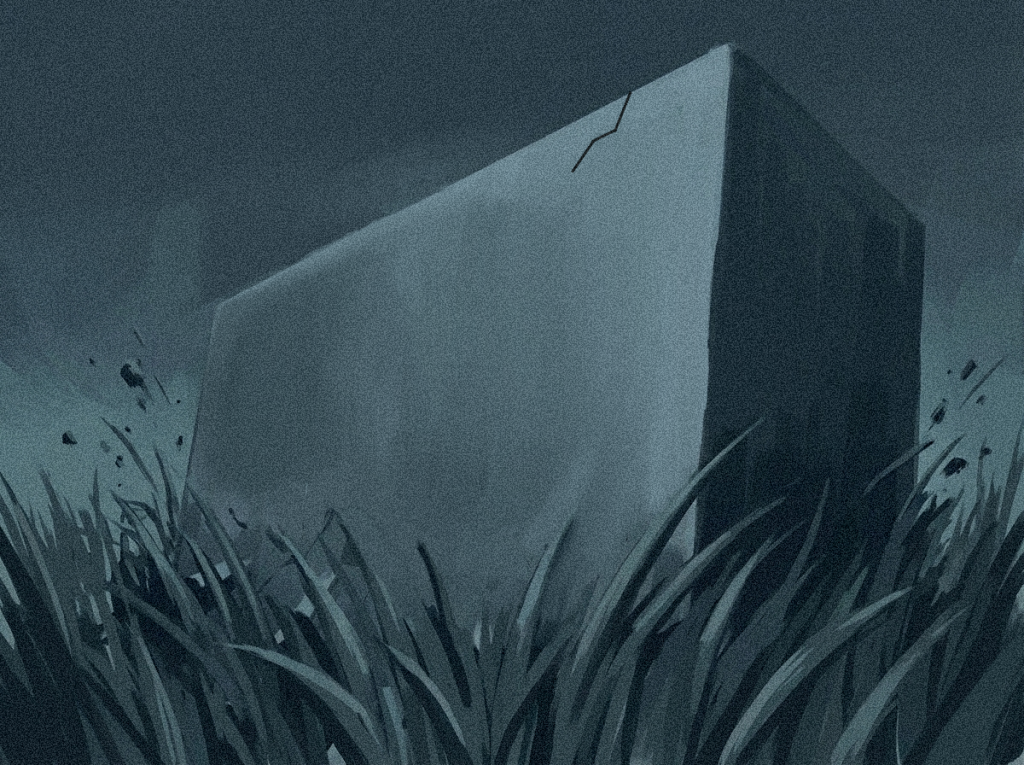
Houdini FX
In Houdini, a box interacting with grass usually involves setting up the grass as curves or thin geometry driven by a system like Vellum for soft-body dynamics. The grass blades are given bend and stiffness constraints so they can flex naturally when forces are applied. The moving box is brought in as a collider, and as it passes through, collision detection pushes the blades aside while preserving their rooted positions at the base.
To enhance realism, attributes like stiffness, damping, and mass can be varied across the grass to avoid uniform motion. You can also add a slight rest animation or wind force so the grass is already moving before the interaction, making the response feel more organic. After the box passes, the constraints allow the blades to spring back over time, and additional effects like drag or noise can help break up the motion and prevent it from looking too rigid or synchronized.
Instead of simulating every blade at full cost, you can use a mask or falloff region based on the box’s position—often created with attributes like distance or a bounding volume—to drive which grass is affected. This keeps distant grass static or lightly animated while only nearby blades are fully simulated, improving performance and control.
A useful trick is to blend between procedural deformation and simulation. For example, you can first apply a simple bend or directional push in SOPs based on the box’s velocity and proximity, then feed that into a Vellum simulation as an initial state. This gives you more art direction and avoids overly chaotic motion. You can also store the “rest” position of the grass and use it to smoothly interpolate the blades back after interaction, rather than relying purely on simulation to settle.
Another layer comes from using velocity transfer: the movement of the box can be converted into attributes that influence the grass directionally, creating a sense of drag as it passes through. Combined with slight randomization in blade length, orientation, and stiffness, this prevents the interaction from feeling too uniform. These workflow details help balance realism, control, and efficiency, which is key when working with dense environments like grass.
Houdini FX
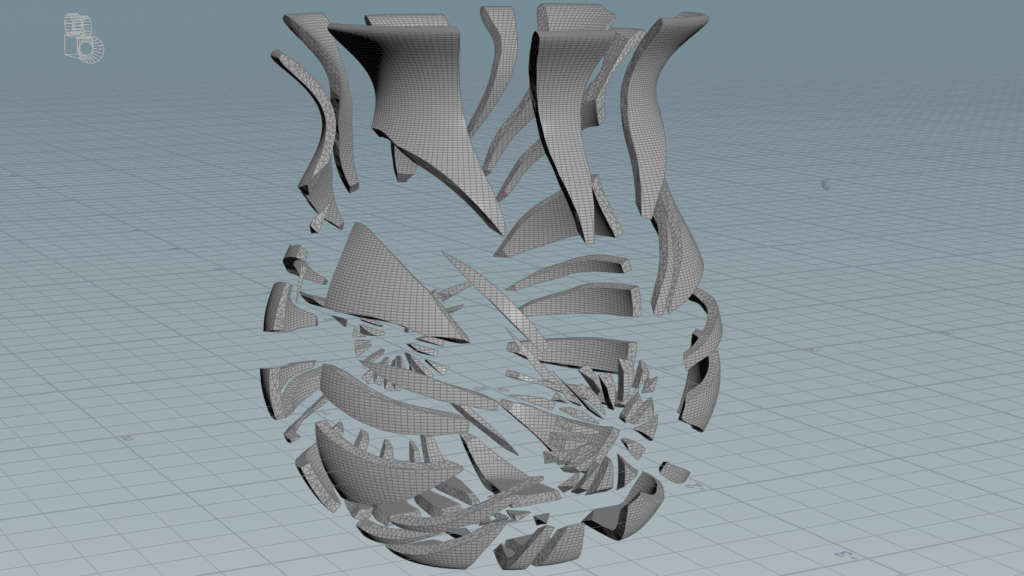
In Houdini, a bullet-through-vase simulation follows a similar DOPnet workflow but at a smaller, faster scale. The vase is pre-fractured into fine pieces and brought into the DOP network as packed rigid bodies with glue constraints holding them together. The bullet is set as a fast-moving collider, and within the DOPnet (using the Bullet solver with increased substeps), the impact causes constraints to break almost instantly, allowing the vase to shatter outward. The result is a quick, explosive breakup, often enhanced afterward with added micro-debris and dust for realism.
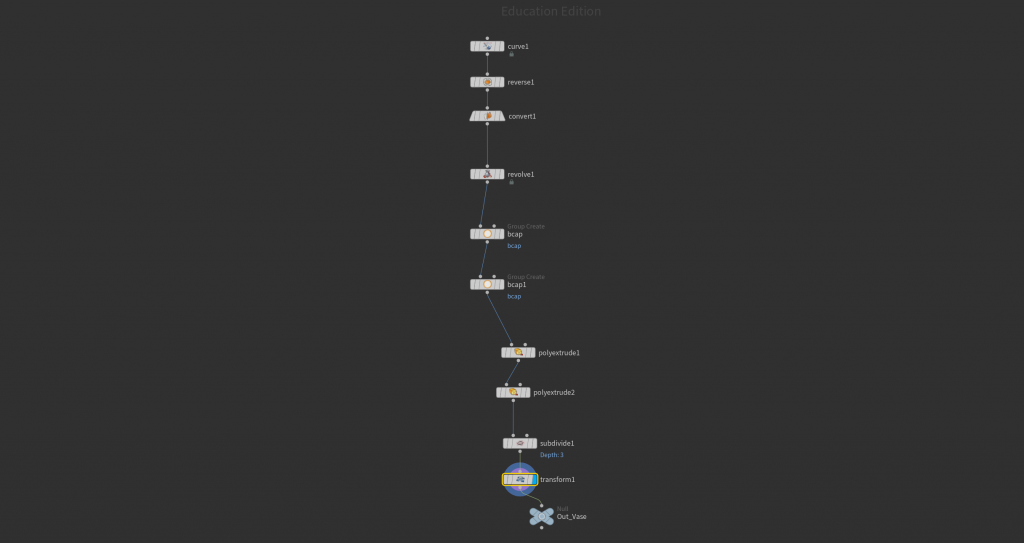
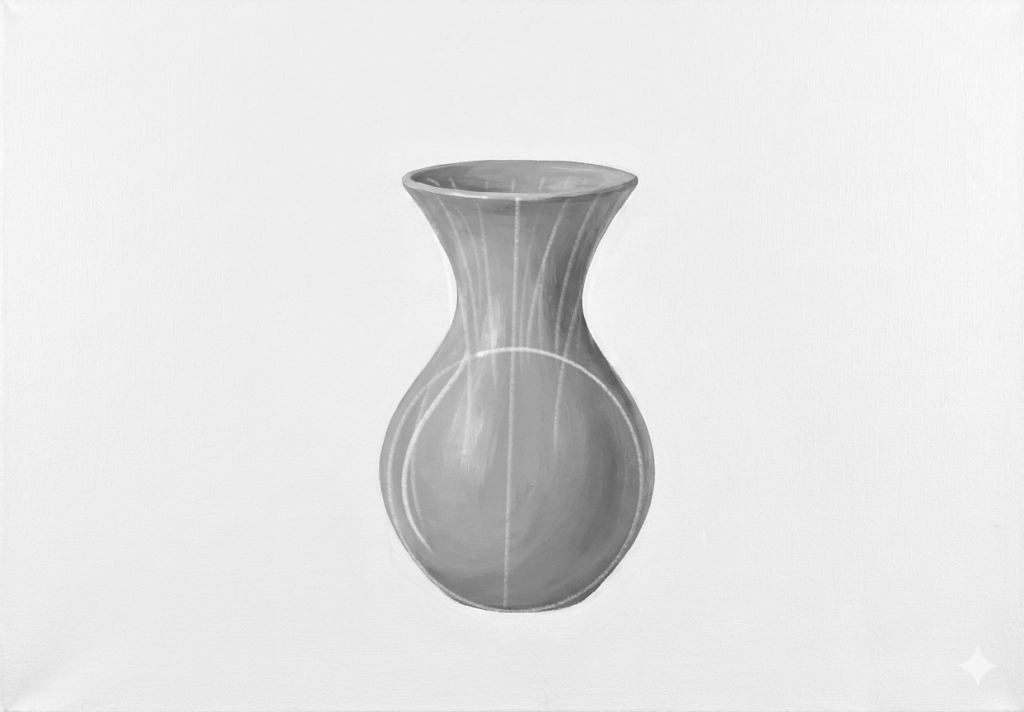
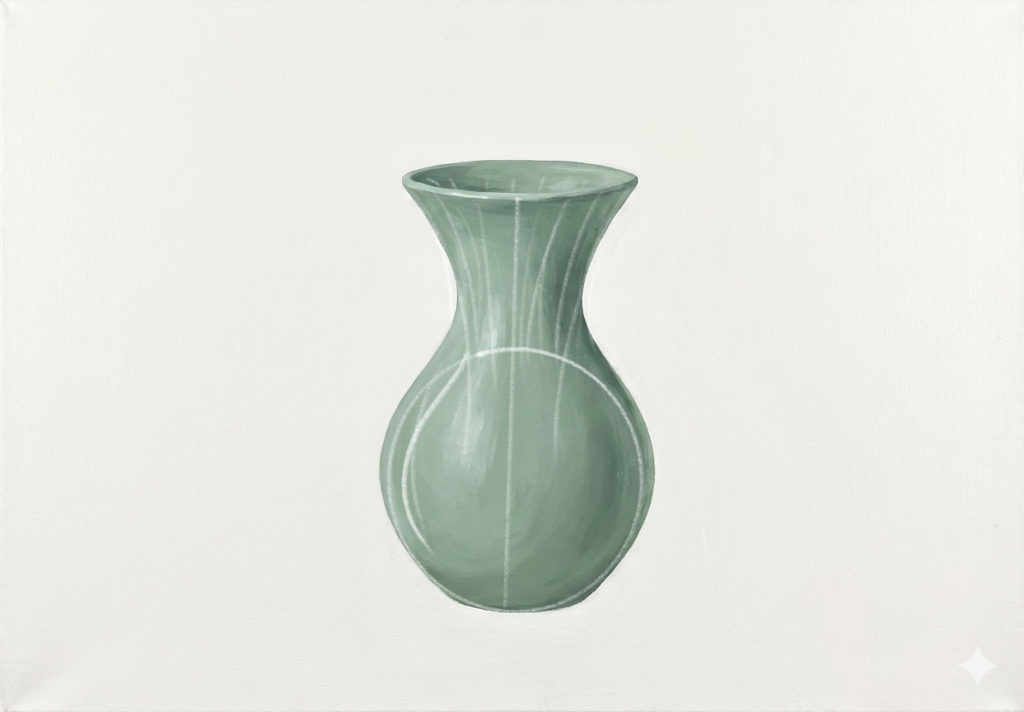
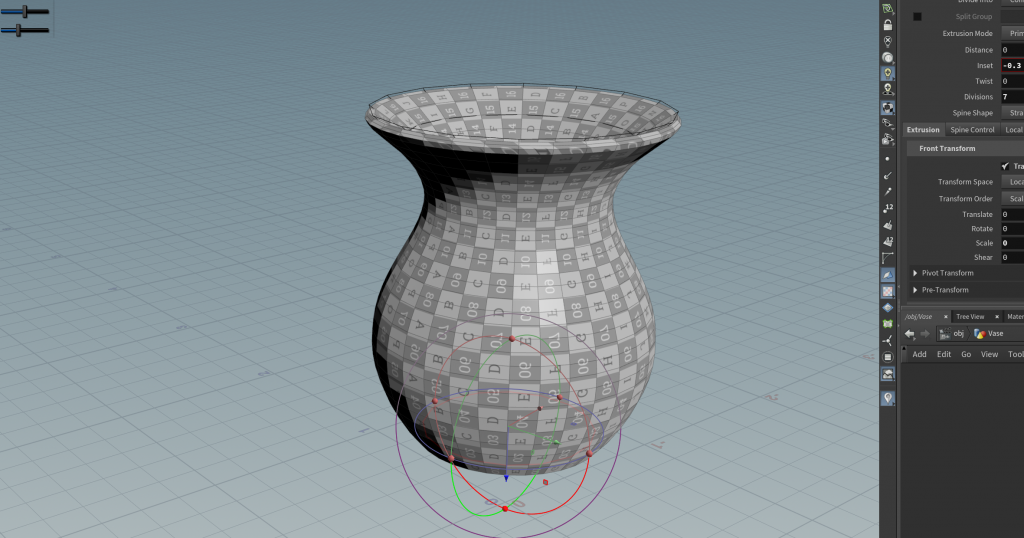
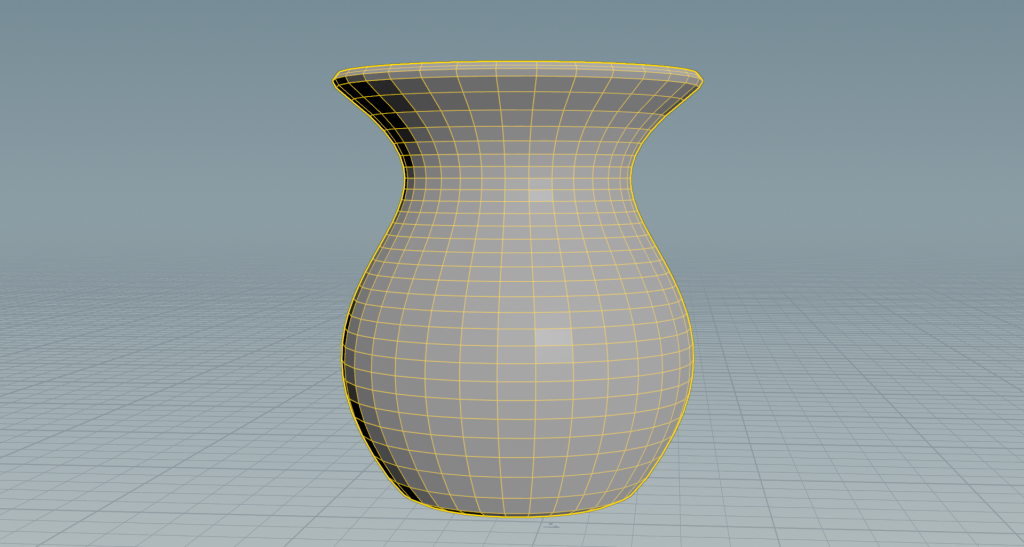
In Houdini, a vase can be created procedurally using basic geometry and modeling nodes in SOPs. You might start with a simple curve that defines the vase’s profile, then use a Revolve node to spin it around an axis and form the main shape. After that, nodes like PolyExtrude are used to give the surface thickness, while additional tweaks with transforms, smoothing, or edge loops help refine the form. Because the setup is procedural, you can easily adjust the silhouette or proportions before sending the geometry into a fracture and DOPnet simulation pipeline.
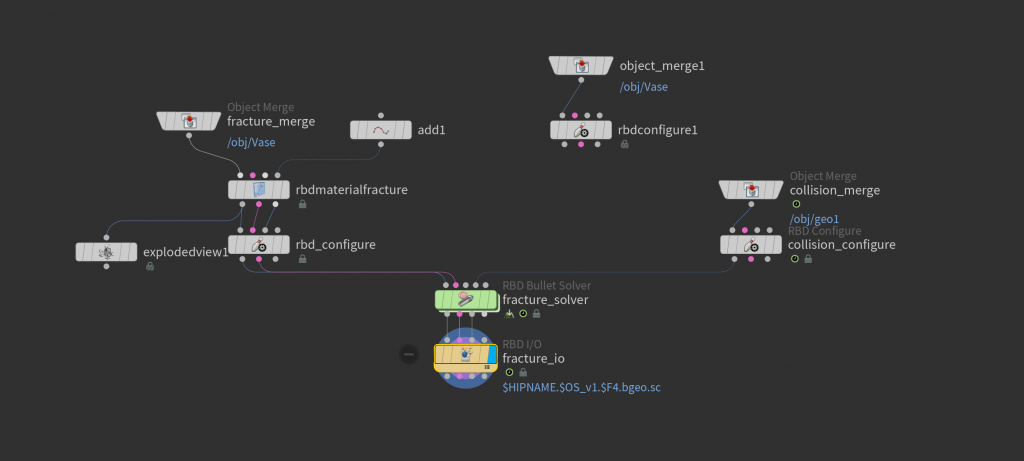
The bullet–vase setup benefits from a few extra steps beyond basic fracturing and DOP simulation. After modeling the vase, you’d typically create more realistic break patterns using a combination of Voronoi fracture and noise-based or radial fractures, often driven by the anticipated impact point of the bullet. This helps concentrate smaller shards around the entry area and larger chunks elsewhere, making the destruction feel more physically believable. You can also predefine interior detail (like jagged edges) so the broken surfaces don’t look too clean.
For the bullet itself, instead of just a simple collider, you can enable continuous collision detection (CCD) in the Bullet solver to prevent it from tunneling through the vase at high speed. You might also animate its velocity precisely or import it with initial momentum attributes, ensuring the solver reads it as a fast-moving, high-energy object. Adding an “impact” attribute or using an Impacts node inside the DOPnet lets you detect the exact collision frame, which can then drive secondary effects like spawning extra fractures or triggering particles.
Another useful technique is layering constraints. For example, combining glue constraints with weaker “soft” constraints allows the vase to first crack and flex slightly before fully breaking apart. You can also use constraint networks that weaken over time or based on proximity to the bullet’s path, creating a more dynamic, progressive shatter instead of a single-frame explosion. Inside the DOPnet, a SOP Solver can modify these constraints on the fly, giving you art direction over how the break propagates.
Finally, after the simulation, additional realism often comes from post-processing: adding velocity blur to fast-moving shards, generating fine secondary debris from larger chunks, and using volumes to simulate air displacement or dust from the impact. These subtle layers help sell the speed and violence of the bullet passing through the vase, making the effect feel more cinematic and less like a simple rigid body breakup.
(Houdini FX)
(Houdini FX)
Collaborative Unit
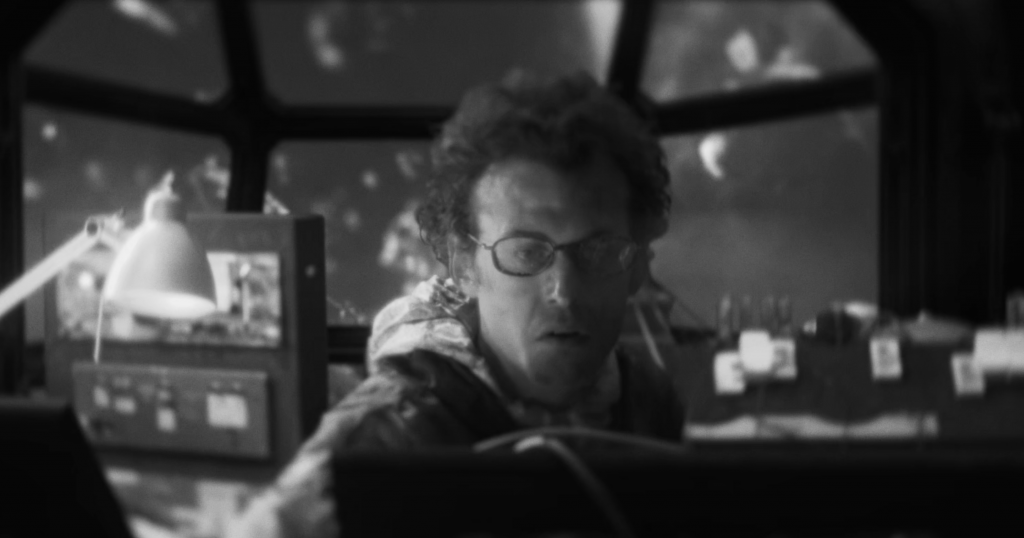
(Motion Capture)
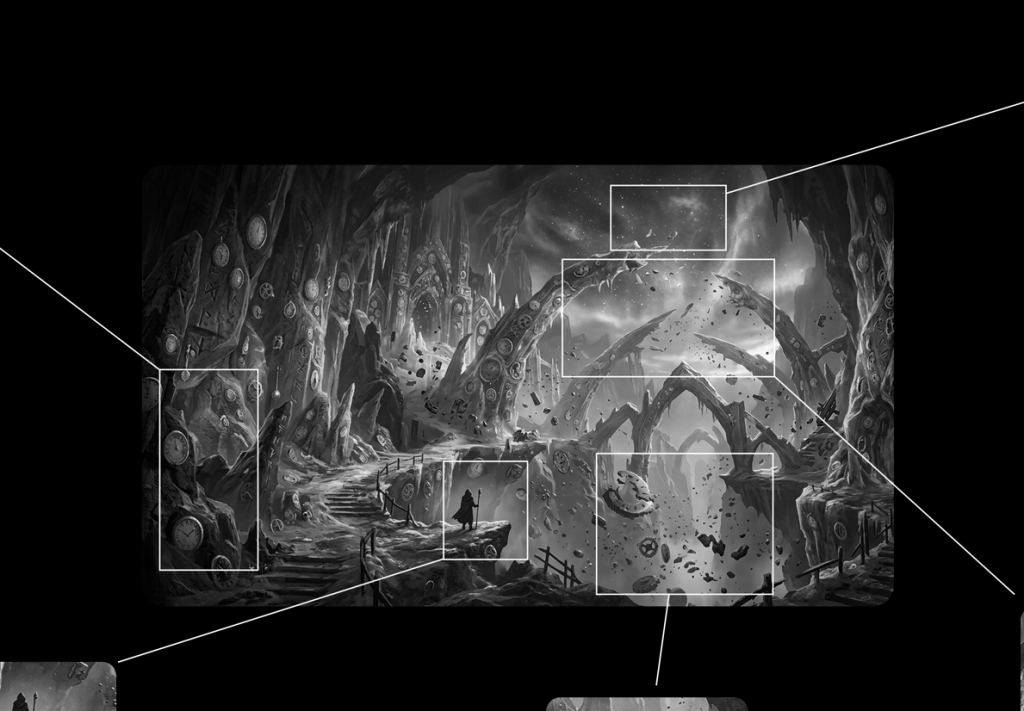
CG Interaction
Houdini FX
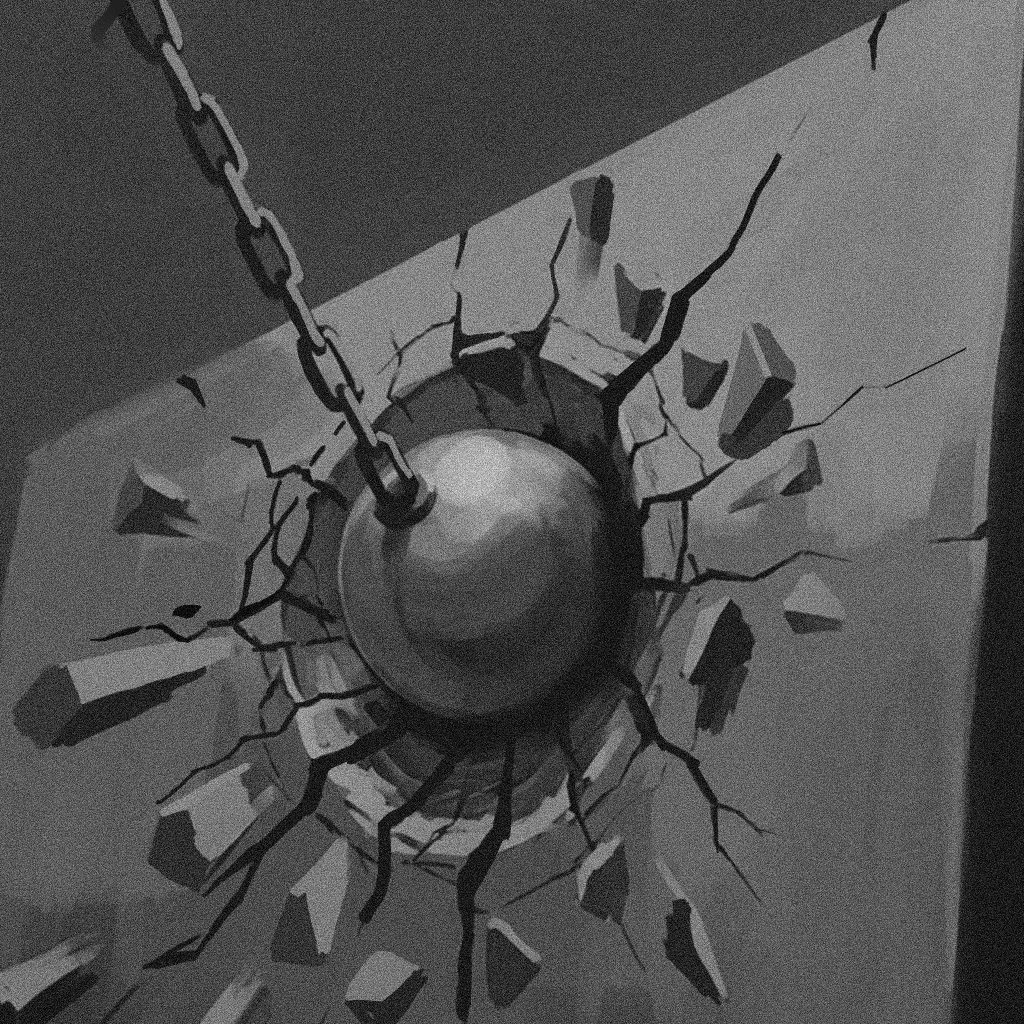
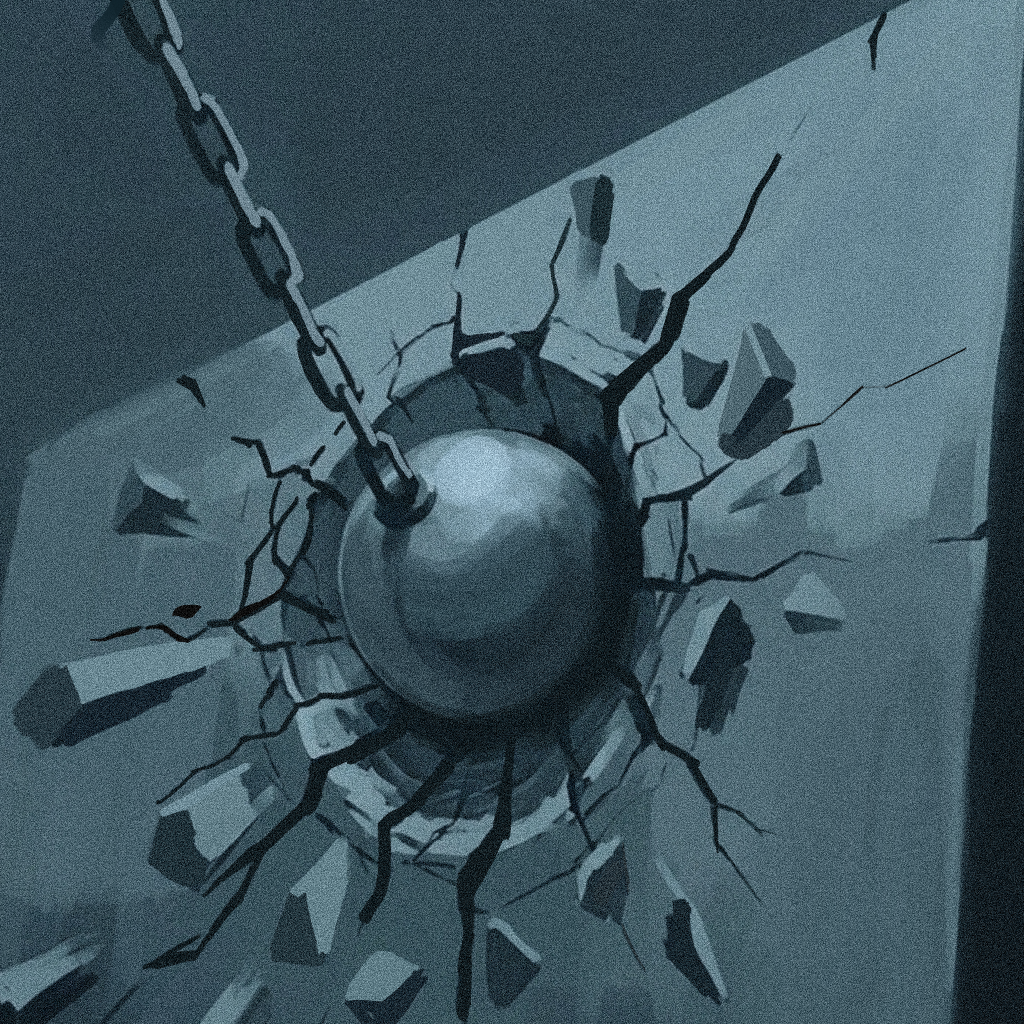
In Houdini, creating a simulation of a ball smashing through a wall typically starts with modeling the wall geometry and preparing it for fracture using tools like Voronoi or Boolean shattering. The ball is set up as a rigid body collider, while the fractured wall pieces are converted into packed rigid bodies within a dynamics network (DOPs). By assigning physical properties such as mass, constraints, and collision settings, you can simulate the impact—where the ball breaks through, constraints snap, and debris scatters realistically. Finally, the simulation is refined with secondary effects like dust, smaller debris, and caching for efficient playback and rendering.
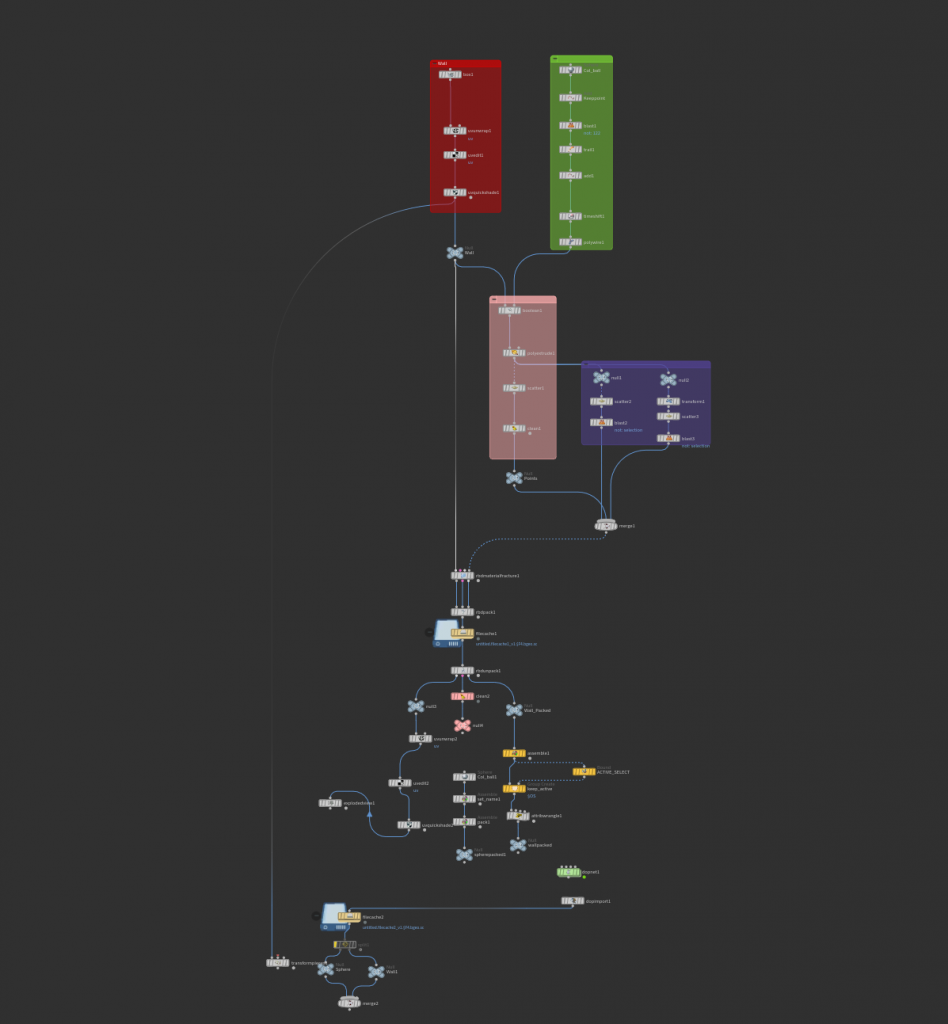
In Houdini, the core of this kind of destruction setup lives inside the DOP network (often called a DOPnet), which is where all the dynamics are actually solved over time. After fracturing the wall in SOPs, the pieces are brought into DOPs using nodes like RBD Packed Object or RBD Material Fracture setups, where each fragment becomes a simulated rigid body. The ball is also imported as a collider with active motion, and forces such as gravity are applied globally. The DOPnet evaluates each timestep, calculating collisions, velocity changes, and constraint behavior to determine how the wall reacts when the ball hits.
A key part of making the wall break convincingly is the constraint network inside the DOPnet. Instead of the wall pieces immediately flying apart, they are held together with constraints (like glue or hard constraints) that define how strong the connections are. When the ball impacts the wall, the solver checks the stress on these constraints; once thresholds are exceeded, they break, allowing chunks to separate and form a hole. You can fine-tune attributes like constraint strength, propagation, and damping to control whether the wall shatters violently or crumbles more gradually.
Within the DOPnet, the Bullet solver is typically used for rigid body simulations because of its speed and stability. It handles collisions between the ball and the fractured pieces efficiently, even with a large number of fragments. Substeps and collision padding can be adjusted to improve accuracy, especially for fast-moving objects like the ball. You can also layer in additional nodes—such as impact analysis or SOP solvers—to modify behavior during the simulation, like triggering extra fracturing or emitting debris exactly at the moment of collision.
Finally, the simulation data is brought back out of the DOPnet into SOPs for caching, refinement, and rendering. At this stage, you might add secondary effects such as dust (via particles or volumes), smaller debris, or motion blur to enhance realism. The DOPnet essentially acts as the “physics brain” of the setup, continuously updating the state of every fractured piece and ensuring the interaction between the ball and wall feels physically believable.
Welcome to myblog.arts. This is your first post. Edit or delete it, then start blogging!